Find out how to create and manage customised prices for your customers in 3 simple steps. The best part: transferring price files via SFTP will save you a lot of time.
Step 1: Set up your prices
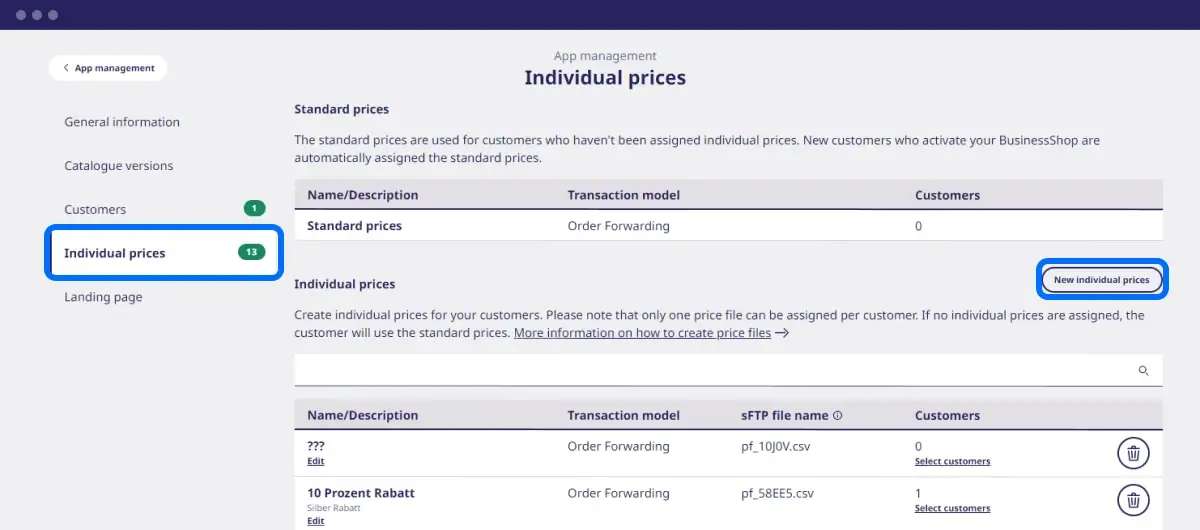
- First, you’ll need to set up new individual prices in your BusinessShop. Go to the App management area, then to the menu item ‘Individual prices’ on the left.
- Click on the button ‘New individual prices’.
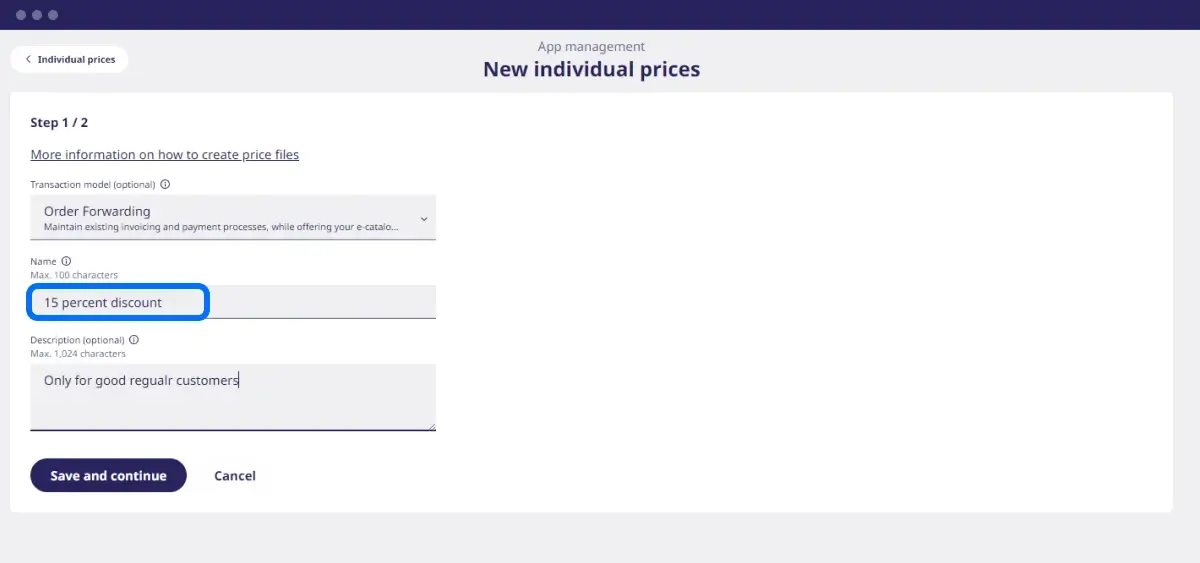
- Now choose a name for the new price category. Make sure you give it a unique name to avoid any confusion as you add more individual prices.
Keep in mind that special characters aren’t permitted. You can use numbers (0 to 9) and letters (a-z and A-Z). You can also add a short description, which will only be visible to you, not your customers. Once you’re done, click on ‘Save and continue’.
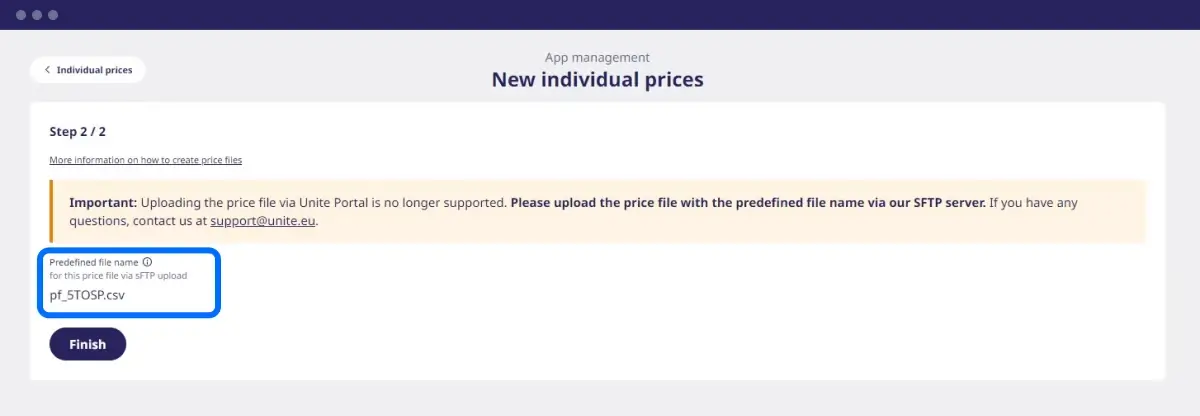
Now our system takes over – it’ll show you how the new prices will be named. In this example, it’s ‘pf_5TOSP.csv’. Info: The price file name is created randomly by our system and may contain numbers (0-9) and letters (A-Z).
If you’re happy with that, confirm by clicking on ‘Finish’.
Step 2: Create, name and transfer your price file
In Step 1, you added new individual prices to your BusinessShop on Unite portal. In this step, we’ll show you how to upload the corresponding price file to our system.
Create your price file
Item numbers, price breaks, unit prices – to make sure your customers can access their new prices, you’ll need to upload a price file with all the necessary data. To do so, set up a table in CSV format using Microsoft Excel or LibreOffice’s Calc. Go to the following link for instructions on how to fill in your price file so our system can read it: https://support.unite.eu/en_GB/howTo/create-price-file-e-procurement
If you have any questions, please get in touch: support@unite.eu.
Name your price file
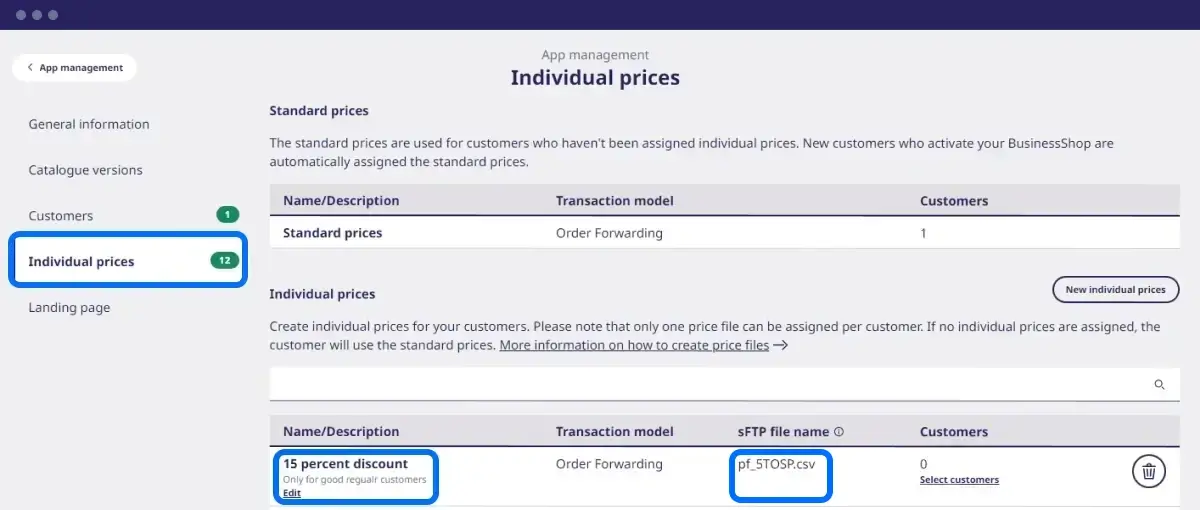
Our system automatically generates a name for your price file. This helps us process it as quickly as possible.
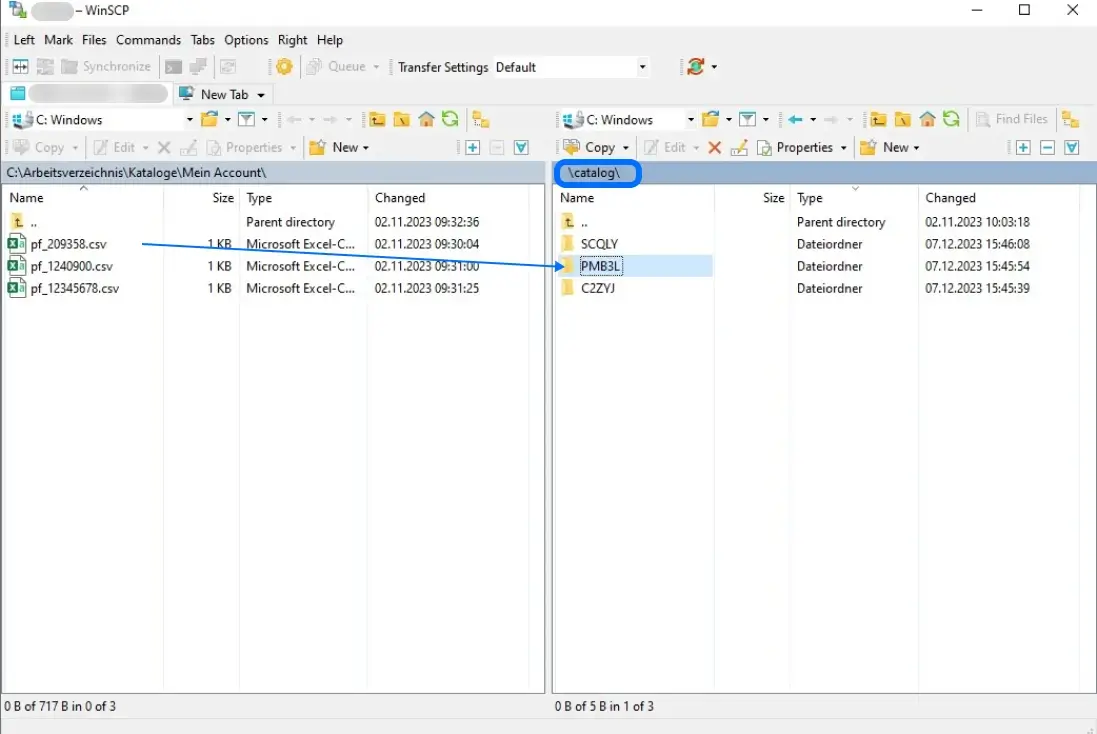
Please name your price file as specified by our system. You can find the file name in the App management area under ‘Individual prices’. There you’ll see all your prices along with their descriptions and the generated SFTP file name (name of the price file). In the example below, the individual prices are ‘15 percent discount’. Our system named this price file ‘pf_5TOSP.csv’. Important: stick to this name when you upload your file so our system can assign it correctly.
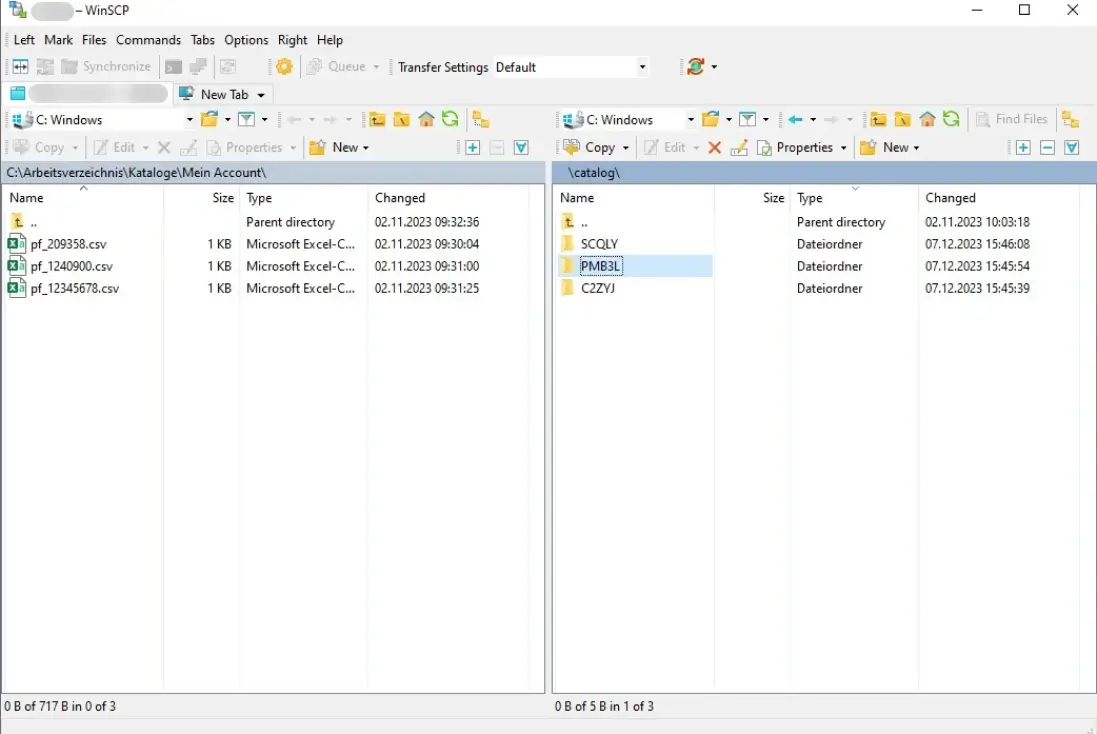
Transfer your price file
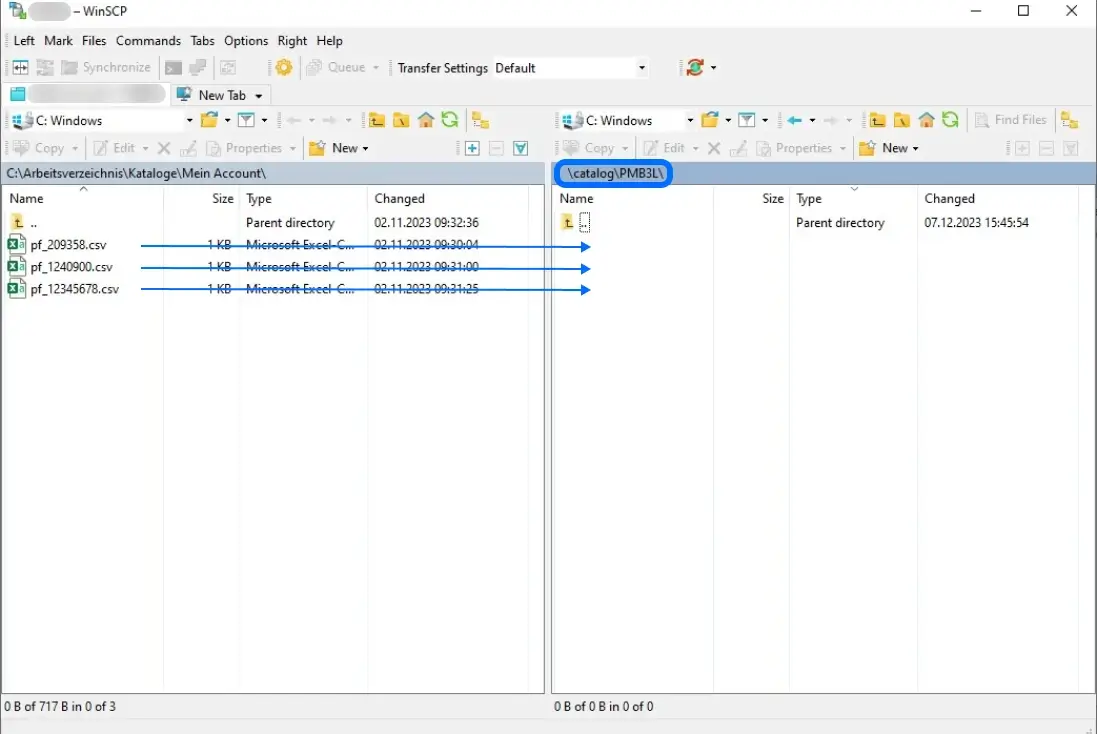
Make sure you’ve saved all the data in your price file and named it as specified by our system. Next, add your price file to the SFTP directory of your BusinessShop.
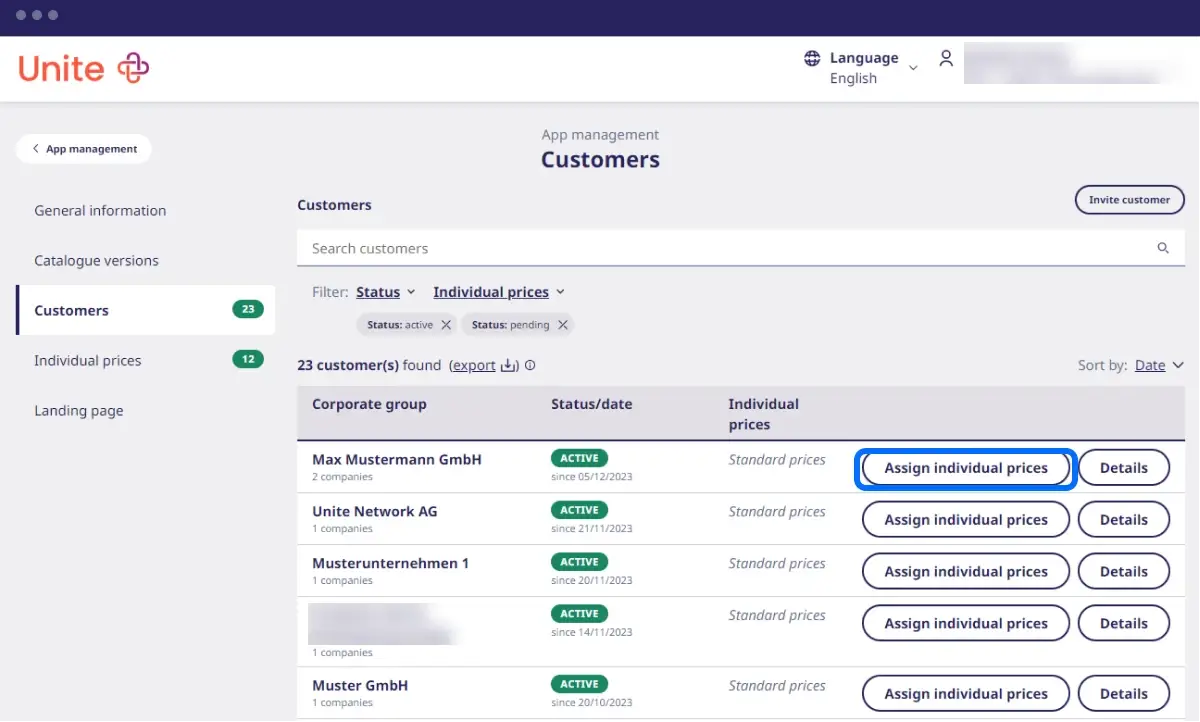
Step 3: Assign prices to a specific customer (optional)
Would you like to offer individual prices to a specific customer? Here’s how:
- First, make sure your customer’s activated for your BusinessShop. Then, go to the menu item ‘Customers’ within App management.
- Select the relevant customer(s) and click on the button ‘Assign individual prices’.
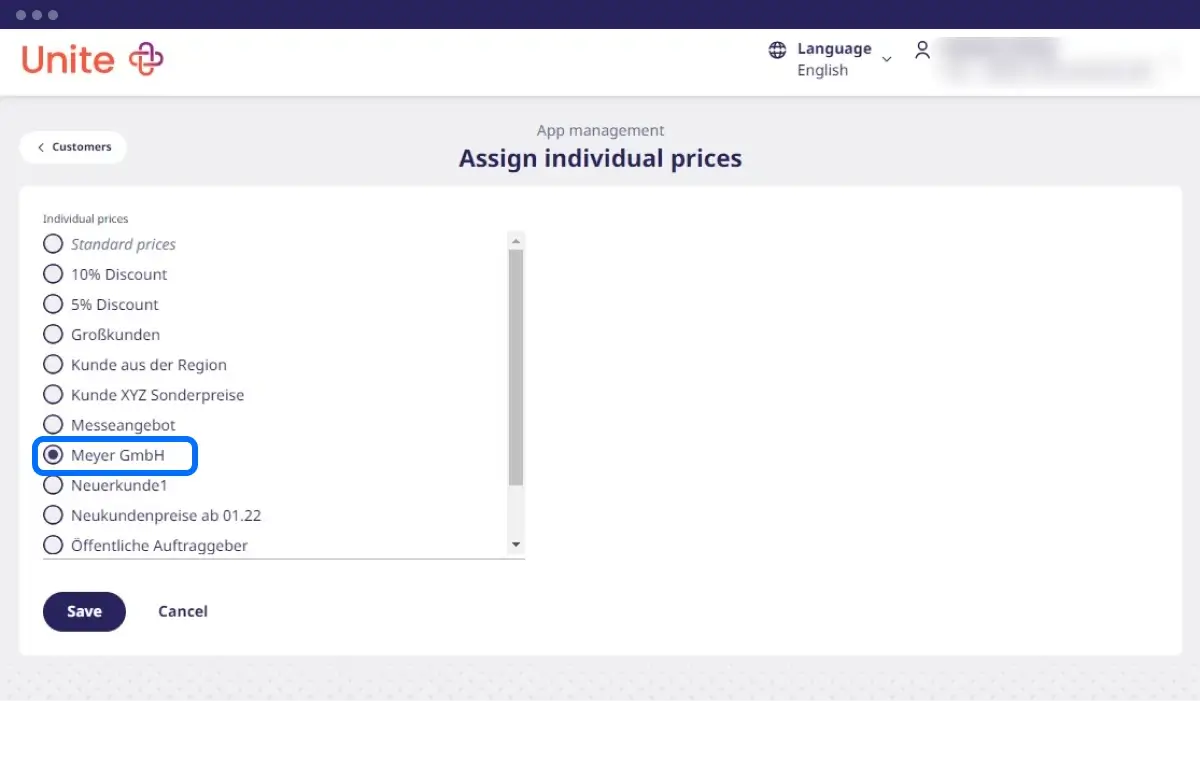
- Select one of the price categories that you set up earlier and click on ‘Save’.